宝宝架构路(二)—— 服务注册与发现机制 + API Gateway 技术选型
原来负责带我的mentor离职,导致组里现在负责架构优化的就剩下自己了,只能让我这个刚毕业的萌新担起这个重任了,从什么都不懂,到自己读文档,到play demo,到落地。
需要学习的东西,还很多。
注:本文不是讲解,不是demo教程。该读官网文档的,请还是去读官网文档,改自己去玩儿demo的,还请去各种try & play。只是这里讲了一些,在尝试的过程中,会遇到的一些坑,可能帮你节约很多时间,以及,我的一些看法。
背景
从传统的单体服务架构,向微服务架构改造。
首要问题
我们最核心想要解决的问题是 特定单个服务的水平扩容能力。
据此,我们瞄准了服务治理中一个很重要的话题,服务注册与发现机制。
为什么服务注册与发现机制能解决水平扩容问题
服务注册和发现,其实就是搞出一个高可用的注册中心,负责维护一组动态的电话号码本。任何一个服务上线的时候,都要主动把自己的号码(ip, port)告诉注册中心。而当一个服务想要调用另一个服务的时候,则通过这个集中的电话号码本来查询目标地址。
尽管服务发现分为客户端发现模式和服务端发现模式,但区别只在于是服务调用方从注册中心拿到目标地址后自己调,还是引入一个API Gateway帮自己调。
架构参见我的另一篇文章:宝宝架构路(一)——分布式链路追踪与服务注册发现调研
为什么需要API网关
在我看来,最直接的一点好处是,微服务化会导致服务模块数量的增加,如果引入发现注册机制后,还由服务自身调用别的服务,那么网络规划将会很混乱,而统一个API Gateway入口,则可以简化调用关系。
此外,API网关其实还可以集中包括过滤、熔断等微服务化后的必要功能,这就需要在完成这波改造之后再逐步探索了。
技术选型探索
解决方案1 —— Kong + Consul
之所以要对Consul这条路做探索,好吧,主要原因是觉得对于主流的Spring,如果引入的话,配合Python服务,有点混搭,不太优雅。
然而事实证明,Kong + Consul 这条路,最折腾的不是Consul本身,而是给它配上一个不错的老婆(API Gateway)。
架构
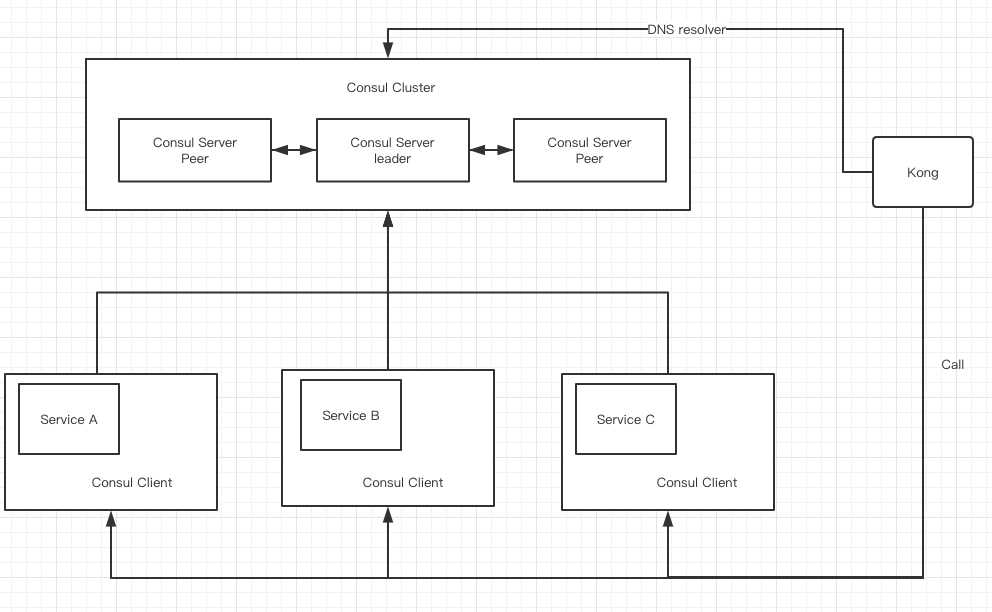
Consul - 是可以完全通过Docker来启动的,很方便,只是需要设定好网桥关系。
Consul Server
Consul可以直接通过Docker启动。
机器A,部署Consul Server,建立Consul Cluster
docker run -d --name=consul-node0 --restart=always \
             -e 'CONSUL_ALLOW_PRIVILEGED_PORTS=' \
             --network=host \
             -h consul-node0 \
             consul agent -server -ui -bootstrap-expect 1 \
             -data-dir /tmp/data-dir \
             -dns-port=53 \
             -node=node0 -bind=172.17.0.2 \
             -rejoin \
             -client 0.0.0.0
机器B,部署Consul Server,并加入机器A的集群中,
docker run -d --name=consul-node1 --restart=always \
             -e 'CONSUL_ALLOW_PRIVILEGED_PORTS=' \
             --network=host \
             -h consul-node1 \
             consul agent -server -ui \
             -data-dir /tmp/data-dir \
             -dns-port=53 \
             -node=node1 -bind=172.17.0.3 \
             -rejoin \
             -join 172.17.0.2 \
             -client 0.0.0.0
然后机器A会被选拔成为 leader,而机器B是peer,

(后续可以加入机器C)
构成Consul集群。
业务服务
Consul最大的好处在于,可以在对我们业务代码无侵入的前提下,实现服务注册。
比如要注册服务A,只需要在服务A所在机器上,同时部署Consul Client,
docker run -d --name=consul-client --restart=always \
            -e 'CONSUL_LOCAL_CONFIG={"leave_on_terminate": true}' \
            --network=host \
            -h consul-client0 \
            consul agent -bind=172.17.0.4 \
            -rejoin-retry-join=172.17.0.2 \
            -data-dir /tmp/data-dir \
            -client 0.0.0.0
然后在 consul.d 配置目录下,加入你想注册服务的配置,比如
python-invoker.json
{
  "service": {
    "name": "python-invoker",
    "tags": ["test"],
    "address": "172.17.0.4",
    "port": 8111,
    "checks": [
      {
        "http": "http://localhost:8111/health",
        "interval": "10s"
      }
    ]
  }
}
然后执行
$ consul reload
那么就可以把服务注册到注册中心,而且client会向服务进行健康检查,减轻注册中心的压力。

通过服务名,dns方式访问,可以作为一切成功的标志
$ dig @x.x.x.x(consul leader ip) python-invoker.service.consul SRV
Kong
Kong 依赖于 Postgresql,Kong的安装有着非常完善的文档,大致可参考:https://docs.konghq.com/install/ubuntu/?_ga=2.201898258.2017894543.1551077903-1262073912.1550480159
这里有一点需要注意,使用的Postgresql账户,必须要有密码。
具体过程不再赘述,关于kong.conf的修改,主要涉及以下部分(DB + DNS):
/etc/kong/kong.conf
#------------------------------------------------------------------------------
# DATASTORE
#------------------------------------------------------------------------------

# Kong will store all of its data (such as Routes, Services, Consumers, and Plugins) in
# either Cassandra or PostgreSQL, and all Kong nodes belonging to the same cluster
# must connect themselves to the same database.
#
# Kong supports the following database versions:
# - **PostgreSQL**: 9.5 and above.
# - **Cassandra**: 2.2 and above.
#

database = postgres             # Determines which of PostgreSQL or Cassandra
                                 # this node will use as its datastore.
                                 # Accepted values are `postgres` and
                                 # `cassandra`.

pg_host = 127.0.0.1             # Host of the Postgres server.
pg_port = 5432                  # Port of the Postgres server.
pg_timeout = 5000               # Defines the timeout (in ms), for connecting,
                                 # reading and writing.

pg_user = kong                  # Postgres user.
pg_password = kong123456                  # Postgres user's password.
pg_database = kong              # The database name to connect to.

pg_ssl = off                    # Toggles client-server TLS connections
                                 # between Kong and PostgreSQL.

pg_ssl_verify = off             # Toggles server certificate verification if
                                 # `pg_ssl` is enabled.
                                 # See the `lua_ssl_trusted_certificate`
                                 # setting to specify a certificate authority.


.
.
.
.
.
.
.
.


#------------------------------------------------------------------------------
# DNS RESOLVER
#------------------------------------------------------------------------------

# By default the DNS resolver will use the standard configuration files
# `/etc/hosts` and `/etc/resolv.conf`. The settings in the latter file will be
# overridden by the environment variables `LOCALDOMAIN` and `RES_OPTIONS` if
# they have been set.
#
# Kong will resolve hostnames as either `SRV` or `A` records (in that order, and
# `CNAME` records will be dereferenced in the process).
# In case a name was resolved as an `SRV` record it will also override any given
# port number by the `port` field contents received from the DNS server.
#
# The DNS options `SEARCH` and `NDOTS` (from the `/etc/resolv.conf` file) will
# be used to expand short names to fully qualified ones. So it will first try the
# entire `SEARCH` list for the `SRV` type, if that fails it will try the `SEARCH`
# list for `A`, etc.
#
# For the duration of the `ttl`, the internal DNS resolver will loadbalance each
# request it gets over the entries in the DNS record. For `SRV` records the
# `weight` fields will be honored, but it will only use the lowest `priority`
# field entries in the record.

dns_resolver = x.x.x.x,x.x.x.x   # Comma separated list of nameservers, each
                                 # entry in `ip[:port]` format to be used by
                                 # Kong. If not specified the nameservers in
                                 # the local `resolv.conf` file will be used.
                                 # Port defaults to 53 if omitted. Accepts
                                 # both IPv4 and IPv6 addresses.

#dns_hostsfile = /etc/hosts      # The hosts file to use. This file is read
                                 # once and its content is static in memory.
                                 # To read the file again after modifying it,
                                 # Kong must be reloaded.

dns_order = LAST,SRV,A,CNAME    # The order in which to resolve different
                                 # record types. The `LAST` type means the
                                 # type of the last successful lookup (for the
                                 # specified name). The format is a (case
                                 # insensitive) comma separated list.

#dns_valid_ttl =                 # By default, DNS records are cached using
                                 # the TTL value of a response. If this
                                 # property receives a value (in seconds), it
                                 # will override the TTL for all records.

#dns_stale_ttl = 4               # Defines, in seconds, how long a record will
                                 # remain in cache past its TTL. This value
                                 # will be used while the new DNS record is
                                 # fetched in the background.
                                 # Stale data will be used from expiry of a
                                 # record until either the refresh query
                                 # completes, or the `dns_stale_ttl` number of
                                 # seconds have passed.

#dns_not_found_ttl = 30          # TTL in seconds for empty DNS responses and
                                 # "(3) name error" responses.

#dns_error_ttl = 1               # TTL in seconds for error responses.

#dns_no_sync = off               # If enabled, then upon a cache-miss every
                                 # request will trigger its own dns query.
                                 # When disabled multiple requests for the
                                 # same name/type will be synchronised to a
                                 # single query.

#------------------------------------------------------------------------------
# DEVELOPMENT & MISCELLANEOUS
#------------------------------------------------------------------------------

# Additional settings inherited from lua-nginx-module allowing for more
# flexibility and advanced usage.
#
# See the lua-nginx-module documentation for more information:
# https://github.com/openresty/lua-nginx-module

#lua_ssl_trusted_certificate =   # Absolute path to the certificate
                                 # authority file for Lua cosockets in PEM
                                 # format. This certificate will be the one
                                 # used for verifying Kong's database
                                 # connections, when `pg_ssl_verify` or
                                 # `cassandra_ssl_verify` are enabled.

#lua_ssl_verify_depth = 1        # Sets the verification depth in the server
                                 # certificates chain used by Lua cosockets,
                                 # set by `lua_ssl_trusted_certificate`.
                                 # This includes the certificates configured
                                 # for Kong's database connections.

#lua_package_path = ./?.lua;./?/init.lua;  # Sets the Lua module search path
                                           # (LUA_PATH). Useful when developing
                                           # or using custom plugins not stored
                                           # in the default search path.
                                           #
                                           # See https://github.com/openresty/lua-nginx-module#lua_package_path

#lua_package_cpath =             # Sets the Lua C module search path
                                 # (LUA_CPATH).
                                 #
                                 # See https://github.com/openresty/lua-nginx-module#lua_package_cpath

#lua_socket_pool_size = 30       # Specifies the size limit for every cosocket
                                 # connection pool associated with every remote
                                 # server.
                                 #
                                 # See https://github.com/openresty/lua-nginx-module#lua_socket_pool_size
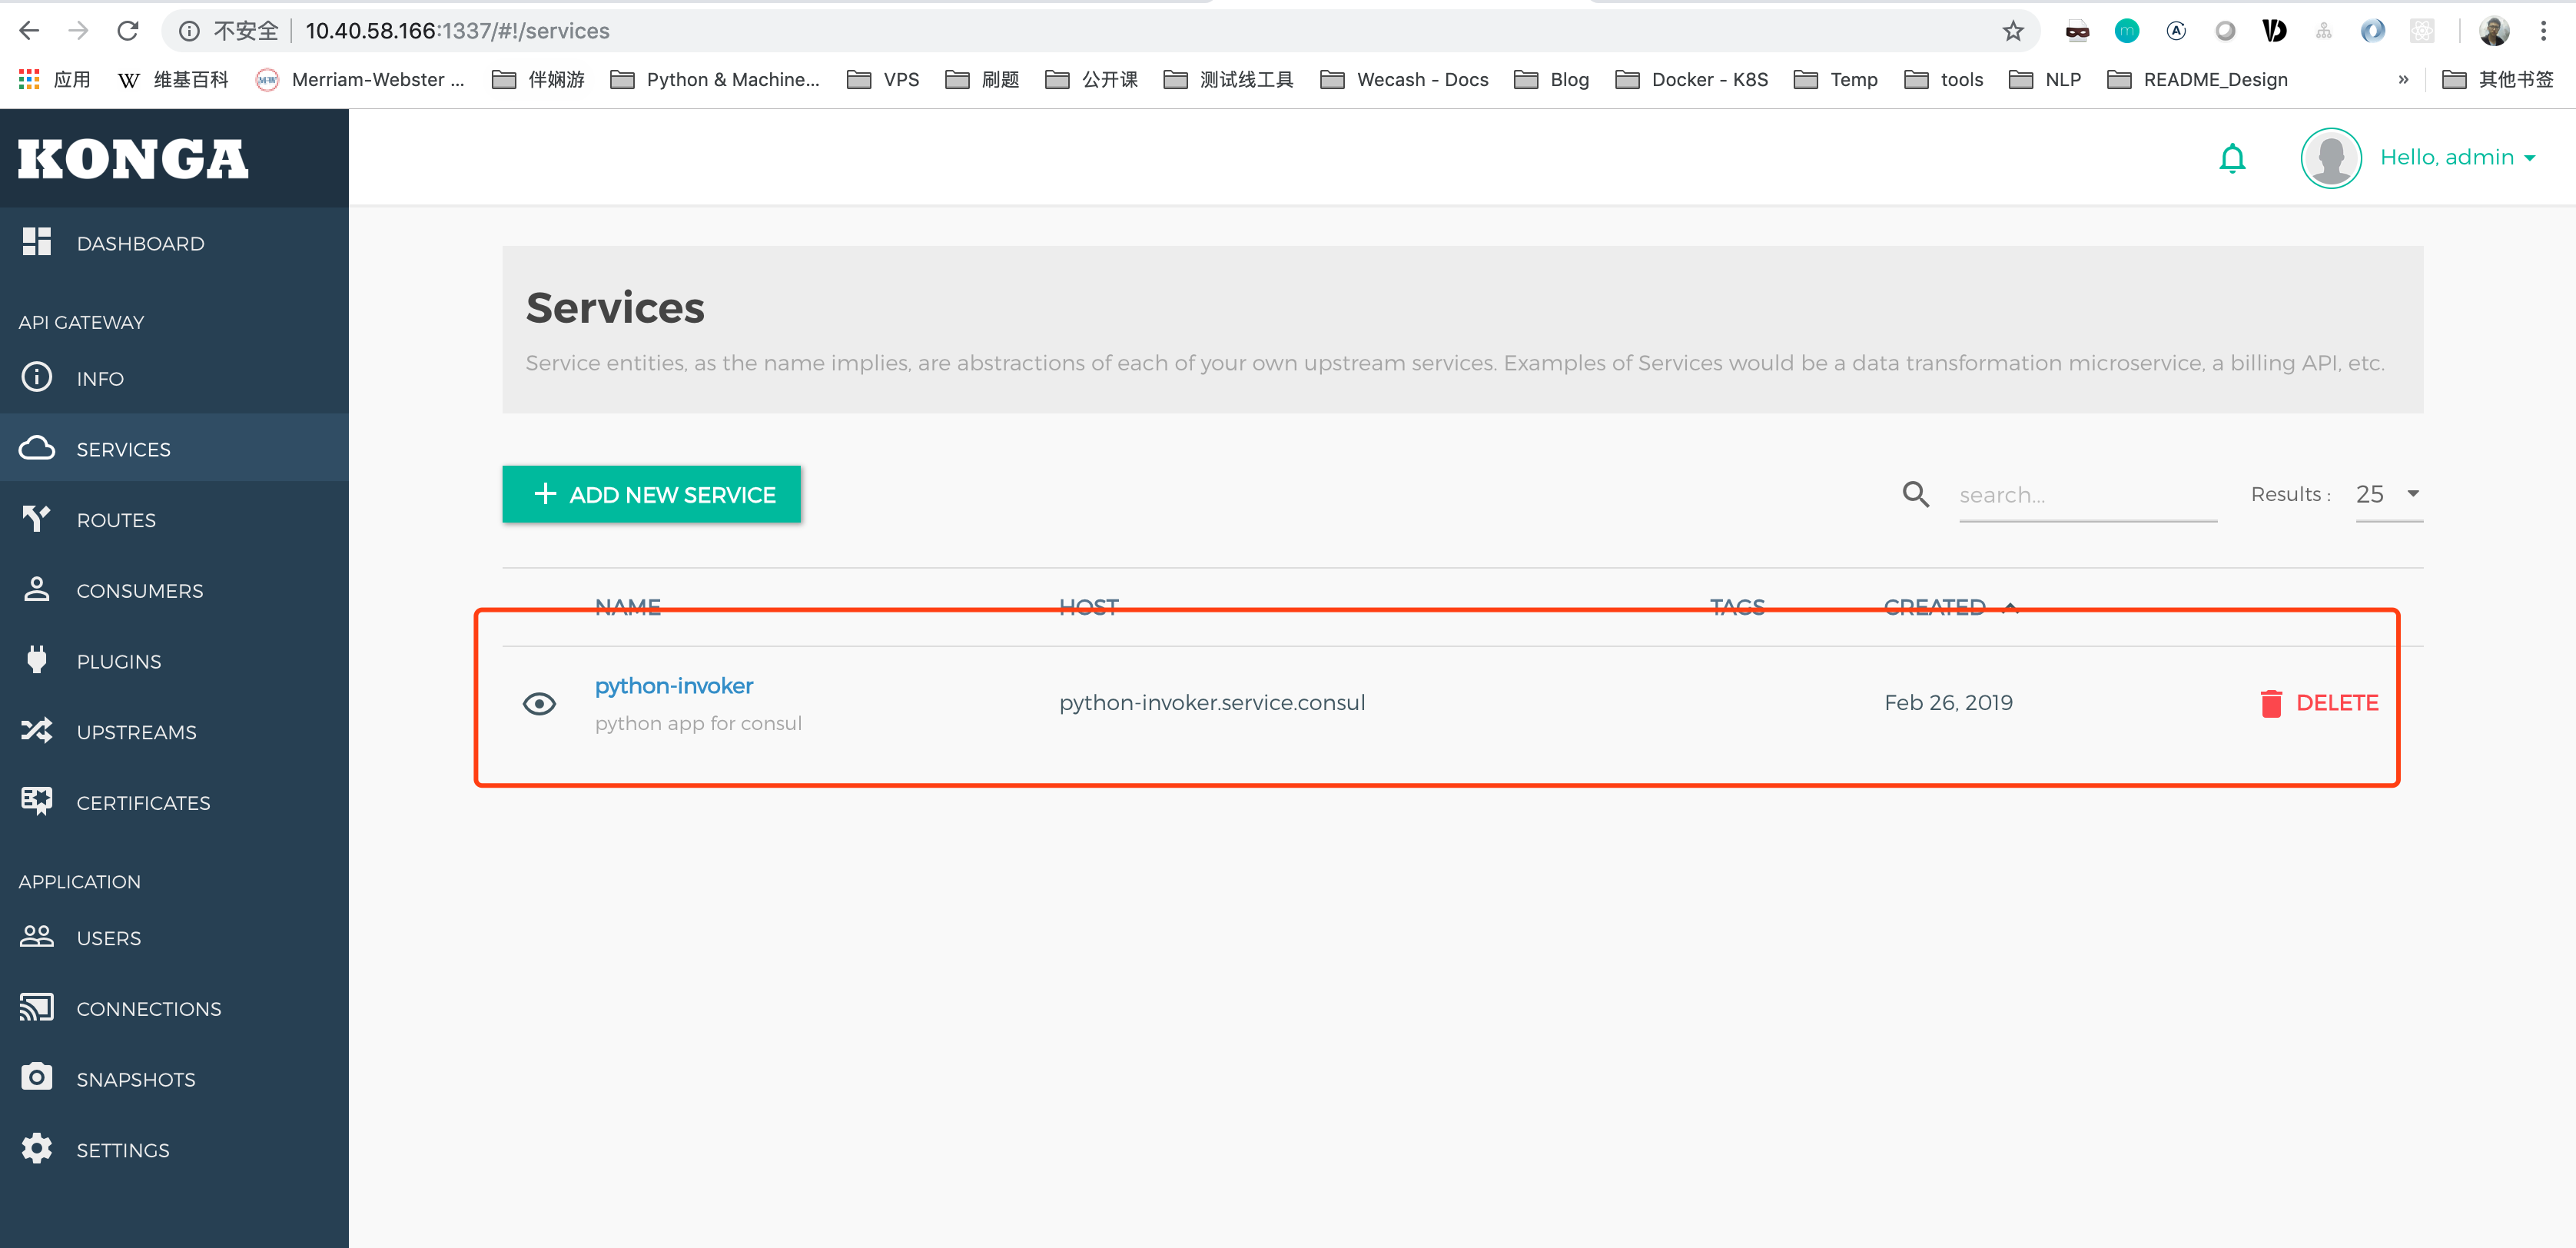
其企业版是有dashboard的,社区版有一个开源的GUI,konga:https://pantsel.github.io/konga/
使用node完成,安装过程大致可参考:https://www.npmjs.com/package/kongadmin
但是需要注意的是,官方文档的
$ npm install bower gulp sails -g
$ git clone https://github.com/pantsel/konga.git
$ cd konga
$ npm install
其实还需要执行一句:
$ bower --allow-root install
附上关键配置
local.js
/**
 * Created by pang on 7/10/2016.
 */
'use strict';

/**
 * Local environment settings
 *
 * While you're DEVELOPING your app, this config file should include
 * any settings specifically for your development computer (db passwords, etc.)
 *
 * When you're ready to deploy your app in PRODUCTION, you can always use this file
 * for configuration options specific to the server where the app will be deployed.
 * But environment variables are usually the best way to handle production settings.
 *
 * PLEASE NOTE:
 *      This file is included in your .gitignore, so if you're using git
 *      as a version control solution for your Sails app, keep in mind that
 *      this file won't be committed to your repository!
 *
 *      Good news is, that means you can specify configuration for your local
 *      machine in this file without inadvertently committing personal information
 *      (like database passwords) to the repo.  Plus, this prevents other members
 *      of your team from committing their local configuration changes on top of yours.
 *
 * For more information, check out:
 * http://links.sailsjs.org/docs/config/local
 */
module.exports = {

  /**
   * The default fallback URL to Kong's admin API.
   */
  // kong_admin_url : process.env.KONG_ADMIN_URL || 'http://127.0.0.1:8001',


  connections: {

  },

  models: {
    connection: process.env.DB_ADAPTER || 'postgres',
  },

  session: {
    secret: '' // Add your own SECRET string here
  },
  port: process.env.PORT || 1337,
  environment: process.env.NODE_ENV || 'development',
  log: {
    level: 'info'
  }
};
connect.js
'use strict';

/**
 * Connections
 * (sails.config.connections)
 *
 * `Connections` are like "saved settings" for your adapters.  What's the difference between
 * a connection and an adapter, you might ask?  An adapter (e.g. `sails-mysql`) is generic--
 * it needs some additional information to work (e.g. your database host, password, user, etc.)
 * A `connection` is that additional information.
 *
 * Each model must have a `connection` property (a string) which is references the name of one
 * of these connections.  If it doesn't, the default `connection` configured in `config/models.js`
 * will be applied.  Of course, a connection can (and usually is) shared by multiple models.
 * .
 * Note: If you're using version control, you should put your passwords/api keys
 * in `config/local.js`, environment variables, or use another strategy.
 * (this is to prevent you inadvertently sensitive credentials up to your repository.)
 *
 * For more information on configuration, check out:
 * http://sailsjs.org/#/documentation/reference/sails.config/sails.config.connections.html
 */
module.exports.connections = {
  /**
   * Local disk storage for DEVELOPMENT ONLY
   *
   * Installed by default.
   */
  localDiskDb: {
    adapter: 'sails-disk',
    filePath:  process.env.NODE_ENV == 'test' ? './.tmp/' : ( process.env.STORAGE_PATH || './kongadata/' ),
    fileName: process.env.NODE_ENV == 'test' ? 'localDiskDb.db' : 'konga.db'
  },

  /**
   * MySQL is the world's most popular relational database.
   * http://en.wikipedia.org/wiki/MySQL
   *
   * Run:
   * npm install sails-mysql
   */
  mysql: {
    adapter: 'sails-mysql',
    url: process.env.DB_URI || null,
    host: process.env.DB_HOST || 'localhost',
    port: process.env.DB_PORT || 3306,
    user: process.env.DB_USER || 'root',
    password: process.env.DB_PASSWORD || null,
    database: process.env.DB_DATABASE || 'konga_database'
  },

  /**
   * MongoDB is the leading NoSQL database.
   * http://en.wikipedia.org/wiki/MongoDB
   *
   * Run:
   * npm install sails-mongo
   */
  mongo: {
    adapter: 'sails-mongo',
    url: process.env.DB_URI || null,
    host: process.env.DB_HOST || 'localhost',
    port: process.env.DB_PORT || 27017,
    user: process.env.DB_USER ||  null,
    password: process.env.DB_PASSWORD ||  null,
    database: process.env.DB_DATABASE ||  'konga_database',
  },

  /**
   * PostgreSQL is another officially supported relational database.
   * http://en.wikipedia.org/wiki/PostgreSQL
   *
   * Run:
   * npm install sails-postgresql
   */
  postgres: {
    adapter: 'sails-postgresql',
    url: process.env.DB_URI,
    host: process.env.DB_HOST || '127.0.0.1',
    user:  process.env.DB_USER || 'konga',
    password: process.env.DB_PASSWORD || 'konga123456',
    port: process.env.DB_PORT || 5432,
    database: process.env.DB_DATABASE ||'konga',
    // schema: process.env.DB_PG_SCHEMA ||'public',
    poolSize: process.env.DB_POOLSIZE || 10,
    ssl: process.env.DB_SSL ? true : false // If set, assume it's true
  },

  /**
   * More adapters:
   * https://github.com/balderdashy/sails
   */

  'sqlserver': {
    adapter: 'sails-sqlserver',
    url: process.env.DB_URI || null,
    host: process.env.DB_HOST || 'localhost',
    user:  process.env.DB_USER || null,
    password: process.env.DB_PASSWORD || null,
    port: process.env.DB_PORT || 49150,
    database: process.env.DB_DATABASE ||'konga_database'
  },
};
(我在使用Docker 启动 Kong 的过程中,发现通过环境变量的形式传入 DNS_RESOLVER会导致Kong报错,相关问题在official github issue中也有提到,但并未给出好的解决方案,见https://github.com/Kong/kong/issues/2574
效果:
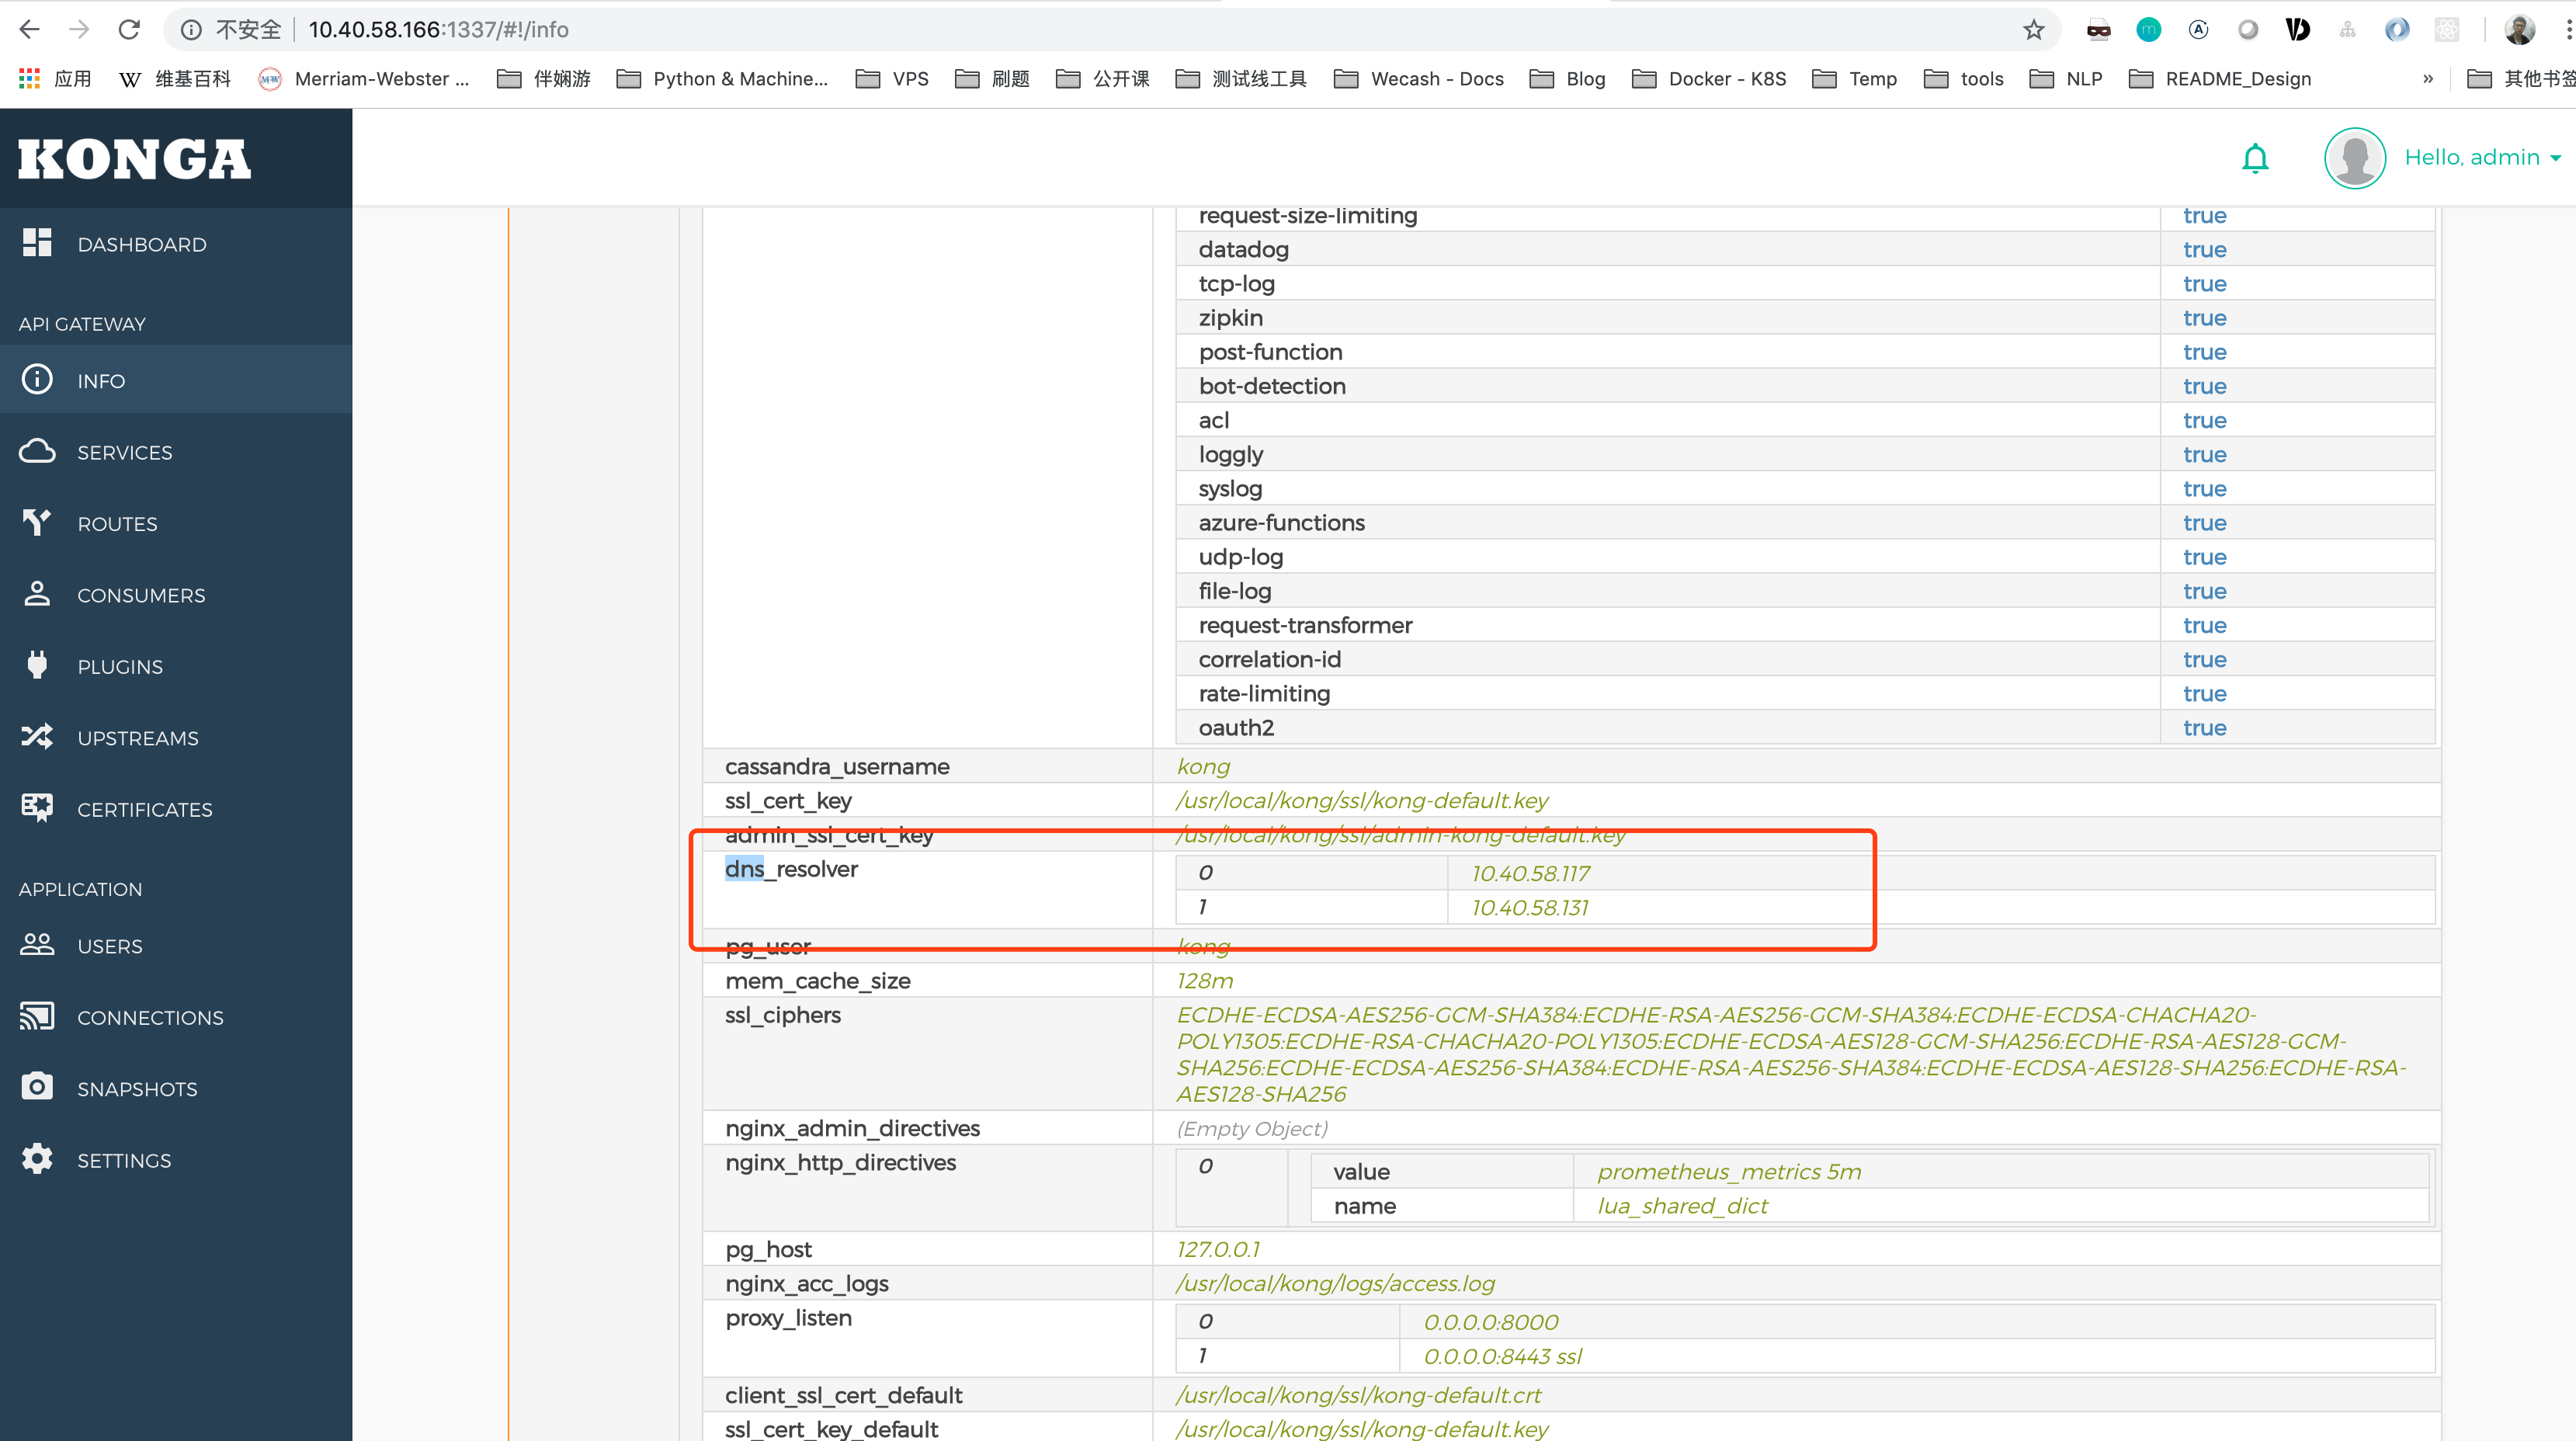
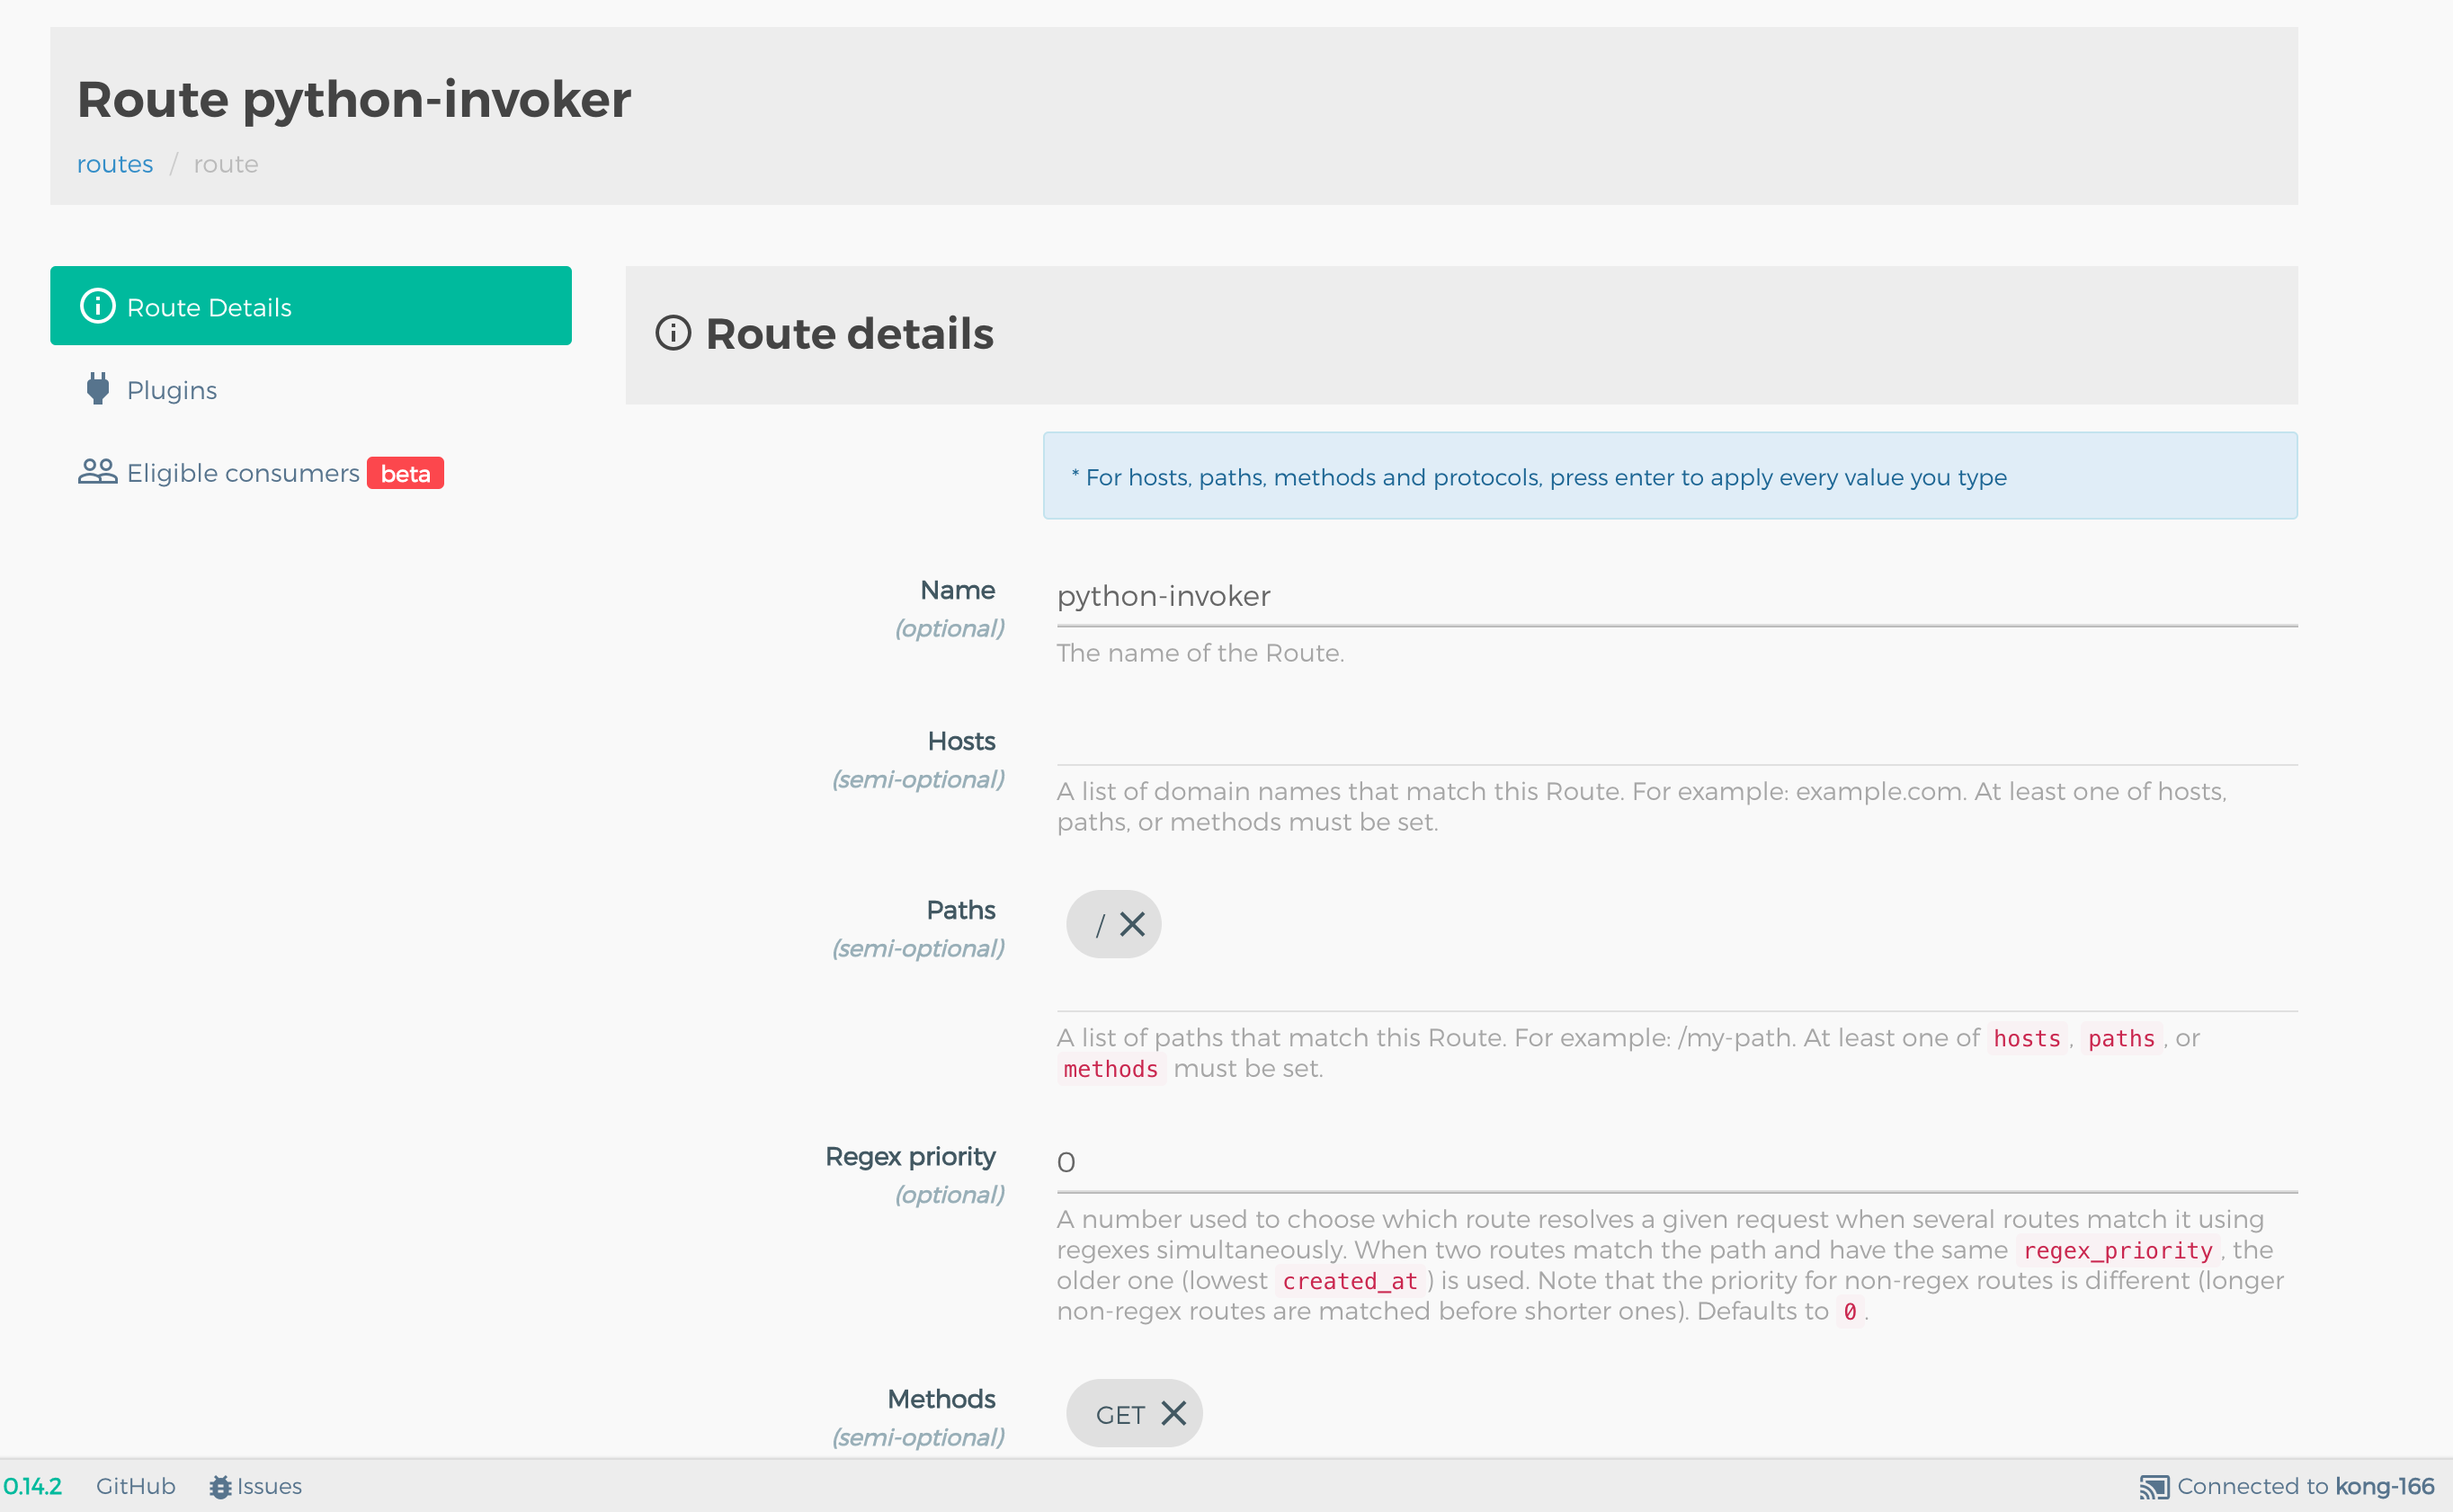
GUI绑定Kong
绑定Consul所在集群,设定DNS,
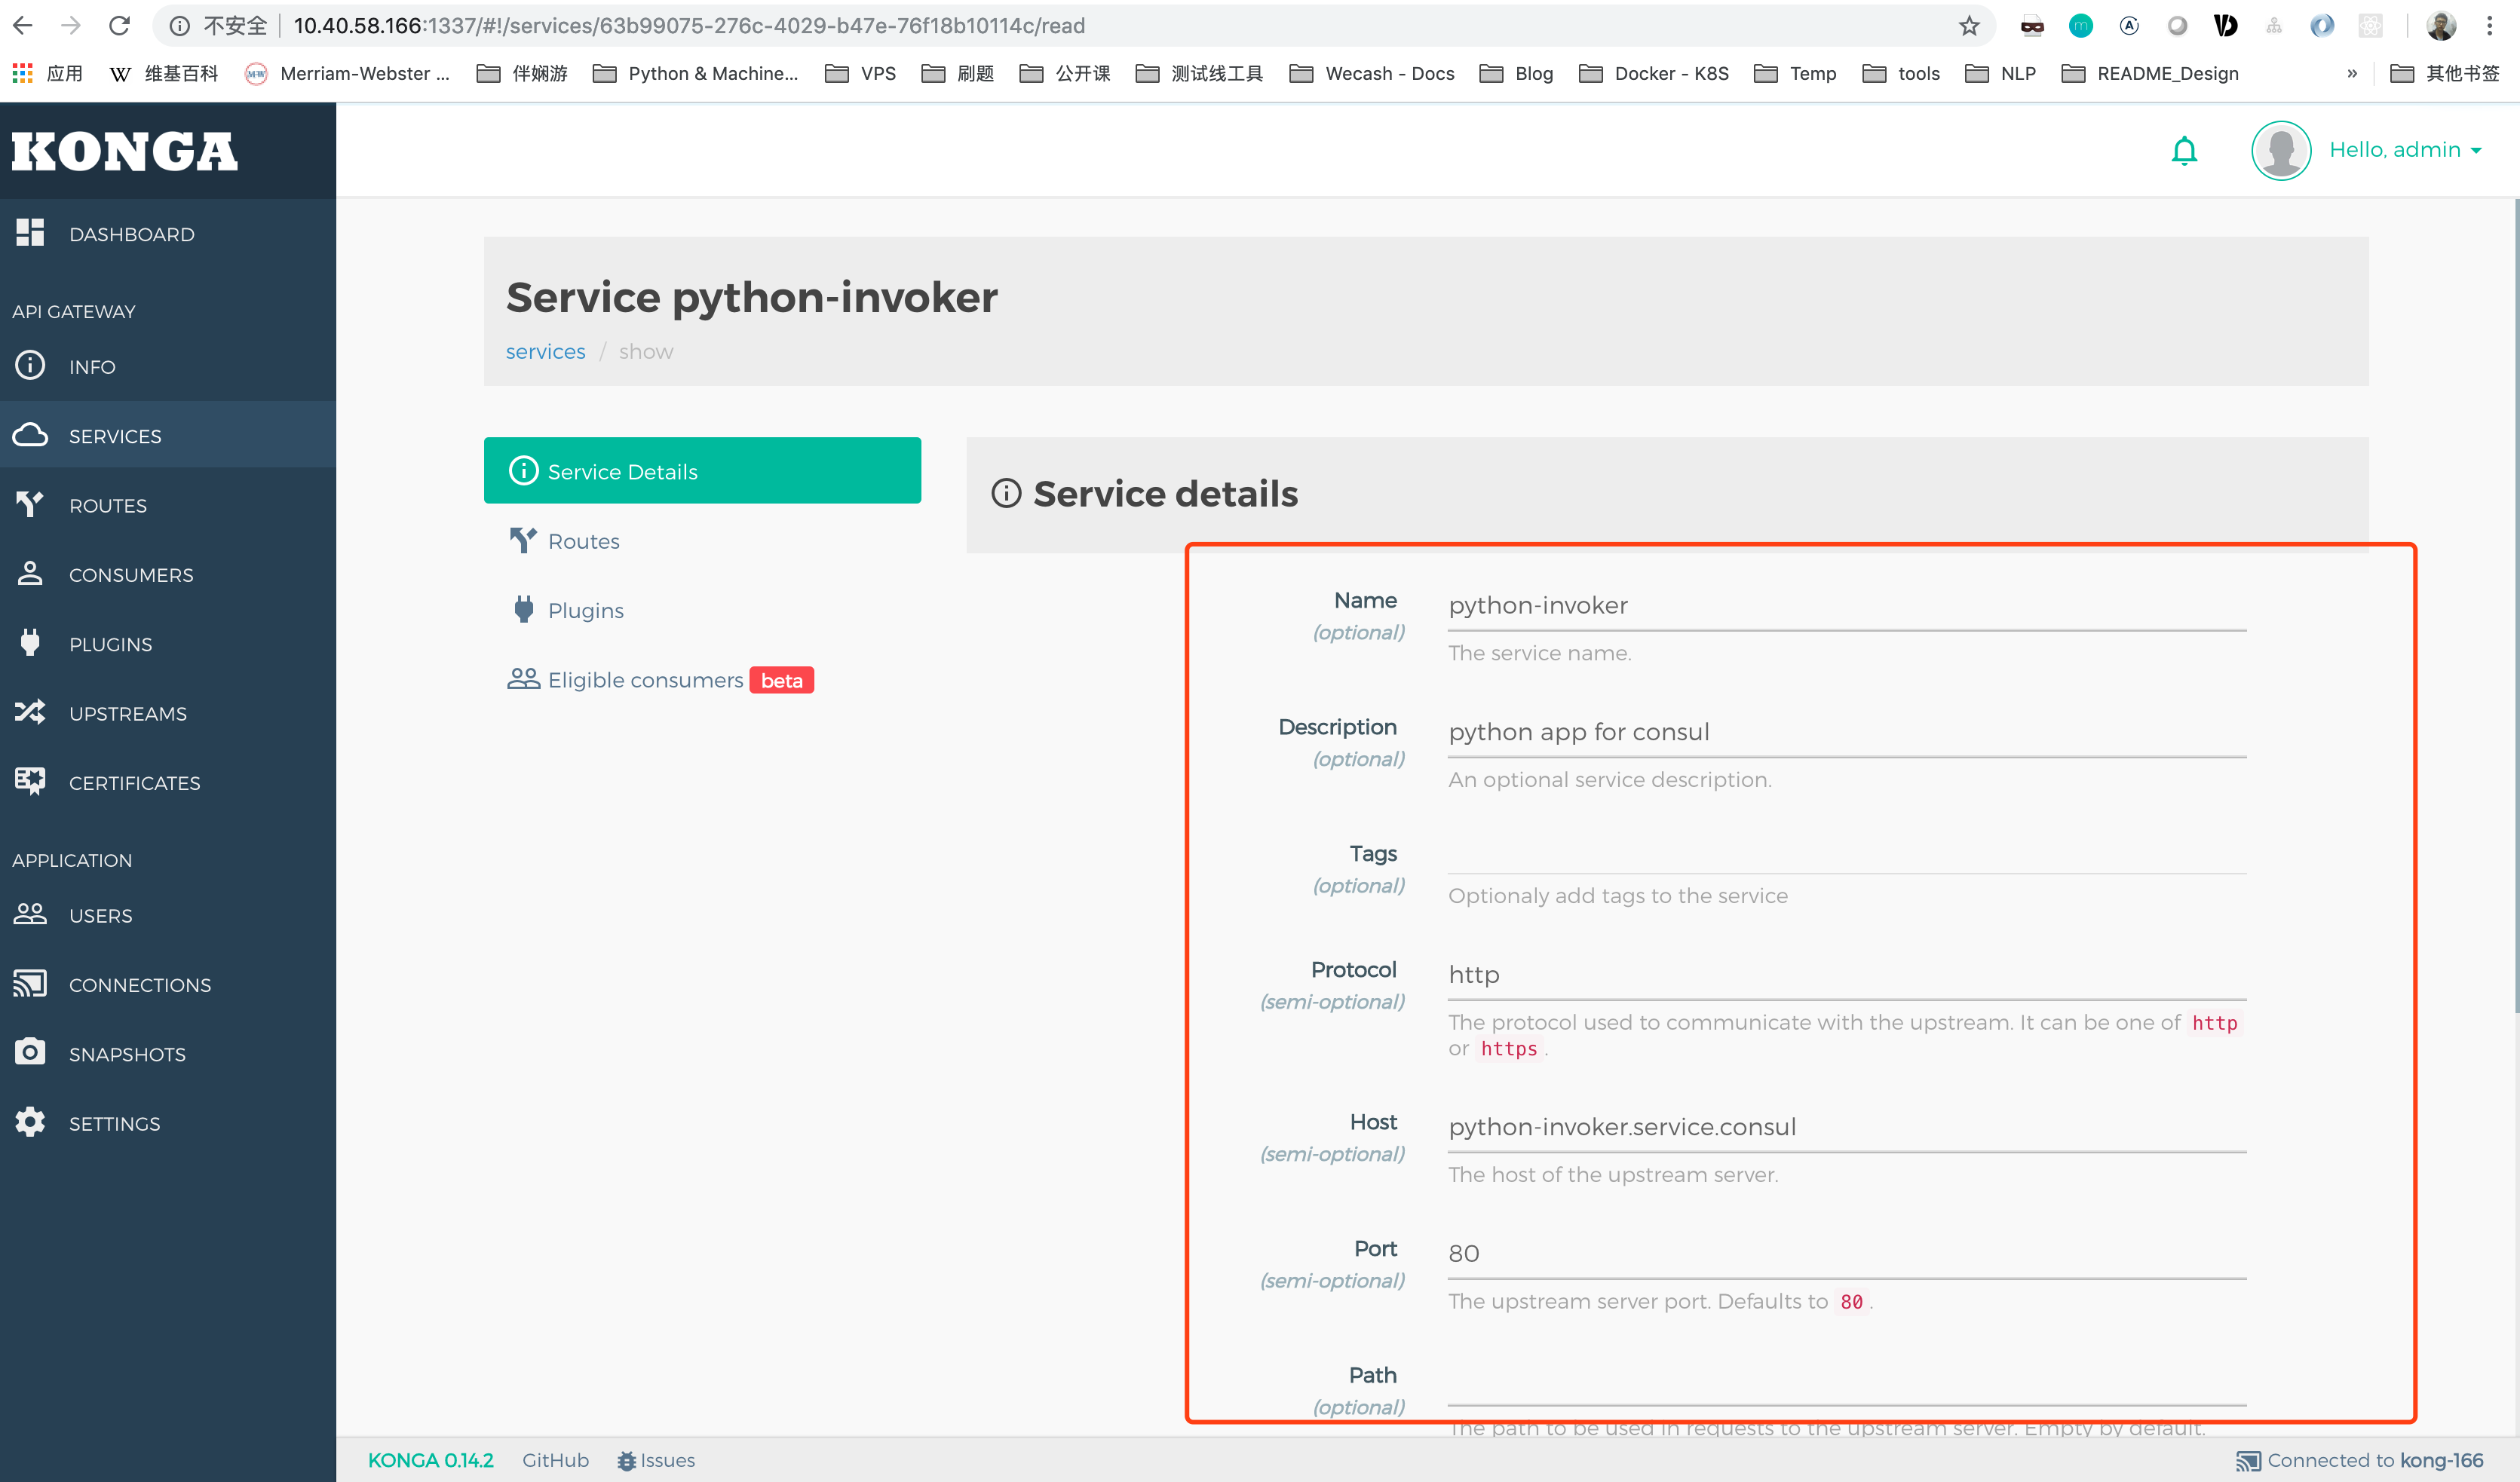
配置服务
配置路由
访问效果

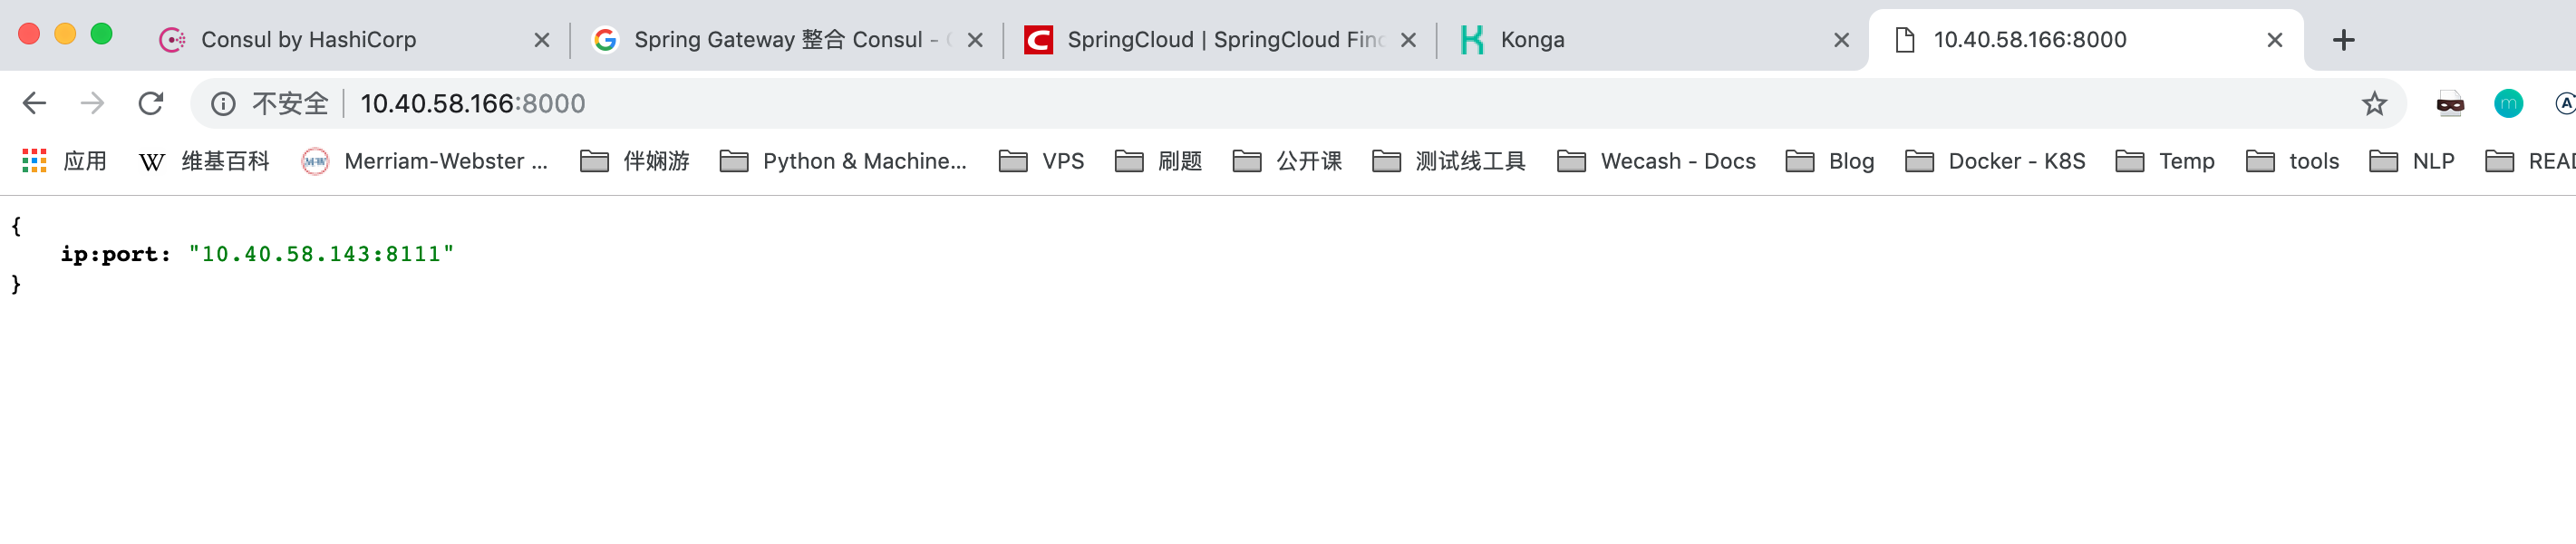 可以发现每次响应的服务端不一定一样,负载均衡。
Kong + Consul 方案涉及系统架构
- 服务注册中心
- 三台服务器组成Consul Server 集群
- 统一网关Gateway
- Kong实现
- 业务服务修改
- 无需修改业务代码,若有健康检查需求,可只是简单增加 /health GET接口即可。
- 为每个服务撰写服务注册配置文件,每台机器需要部署Consul Client
解决方案2 —— Java Spring Cloud Gateway + Java Spring Cloud Eureka
探索过程
这块儿的探索,主要是围绕Java Spring Cloud技术栈进行的探索,也就是说,基础组件用Java,业务逻辑用Python。
架构:
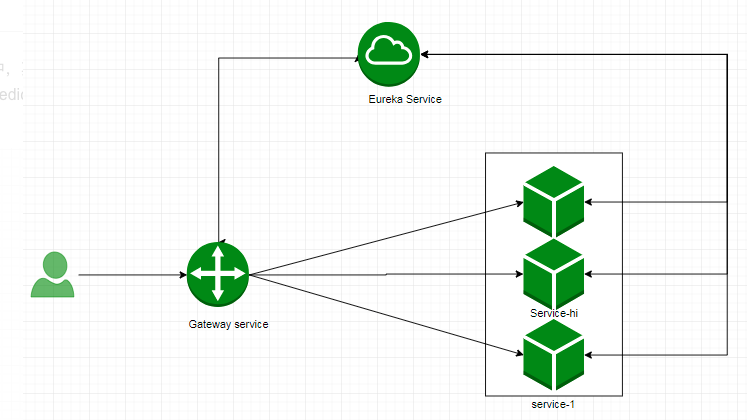
这条路,可以说是Java流的主流选择,这里不再赘述,只是附上我自己在实践过程中的一些关键配置文件做参考。
Eureka
依赖文件:pom.xml
<?xml version="1.0" encoding="UTF-8"?>
<project xmlns="http://maven.apache.org/POM/4.0.0" xmlns:xsi="http://www.w3.org/2001/XMLSchema-instance"
         xsi:schemaLocation="http://maven.apache.org/POM/4.0.0 http://maven.apache.org/xsd/maven-4.0.0.xsd">
    <modelVersion>4.0.0</modelVersion>
    <parent>
        <groupId>org.springframework.boot</groupId>
        <artifactId>spring-boot-starter-parent</artifactId>
        <version>2.1.3.RELEASE</version>
        <relativePath/> <!-- lookup parent from repository -->
    </parent>
    <groupId>com.model</groupId>
    <artifactId>eureka-server</artifactId>
    <version>0.0.1-SNAPSHOT</version>
    <packaging>jar</packaging>
    <name>eureka-server</name>
    <description>Demo project for Spring Boot</description>

    <properties>
        <java.version>1.8</java.version>
        <spring-cloud.version>Finchley.RELEASE</spring-cloud.version>
    </properties>

    <dependencies>
        <dependency>
            <groupId>org.springframework.boot</groupId>
            <artifactId>spring-boot-starter-web</artifactId>
        </dependency>
        <dependency>
            <groupId>org.springframework.cloud</groupId>
            <artifactId>spring-cloud-starter-netflix-eureka-server</artifactId>
        </dependency>

        <dependency>
            <groupId>org.springframework.boot</groupId>
            <artifactId>spring-boot-starter-test</artifactId>
            <scope>test</scope>
        </dependency>
    </dependencies>

    <dependencyManagement>
        <dependencies>
            <dependency>
                <groupId>org.springframework.cloud</groupId>
                <artifactId>spring-cloud-dependencies</artifactId>
                <version>${spring-cloud.version}</version>
                <type>pom</type>
                <scope>import</scope>
            </dependency>
        </dependencies>
    </dependencyManagement>

    <build>
        <finalName>${project.artifactId}</finalName>
        <plugins>
            <plugin>
                <groupId>org.springframework.boot</groupId>
                <artifactId>spring-boot-maven-plugin</artifactId>
            </plugin>
        </plugins>
    </build>

    <repositories>
        <repository>
            <id>spring-milestones</id>
            <name>Spring Milestones</name>
            <url>https://repo.spring.io/milestone</url>
        </repository>
    </repositories>

</project>
配置文件:application.yml
tpd:
  peer1Port: 8761
  peer2Port: 8762

management:
  endpoint:
    health:
      enabled: true
      show-details: always
    shutdown:
      enabled: true
  endpoints:
    web:
      base-path: /
      # By default, only 'health' and 'info' are accessible via web
      exposure:
        include: '*'
---
spring:
  profiles: peer1
eureka:
  instance:
    # See blog post for details, modify /etc/hosts
    hostname: eureka-peer1
    # Either this one or the spring boot name must be the same
    # (it works without setting it too, using the alias UNKNOWN)
    appname: eureka-cluster
  client:
    serviceUrl:
      defaultZone: http://eureka-peer2:${tpd.peer2Port}/eureka
    register-with-eureka: true
    fetch-registry: true
server:
  port: ${tpd.peer1Port}

---
spring:
  profiles: peer2
eureka:
  instance:
    hostname: eureka-peer2
    appname: eureka-cluster
  client:
    serviceUrl:
      defaultZone: http://eureka-peer1:${tpd.peer1Port}/eureka
    register-with-eureka: true
    fetch-registry: true
server:
  port: ${tpd.peer2Port}
另外还需要在入口类处修改,
package com.model.eurekaserver;

import org.springframework.boot.SpringApplication;
import org.springframework.boot.autoconfigure.SpringBootApplication;
import org.springframework.cloud.netflix.eureka.server.EnableEurekaServer;

@SpringBootApplication
@EnableEurekaServer
public class EurekaServerApplication {

    public static void main(String[] args) {
        SpringApplication.run(EurekaServerApplication.class, args);
    }

}
效果
将同一个服务,分不同端口注册到Eureka

然后利用python-eureka-client针对Eureka直接进行调用:
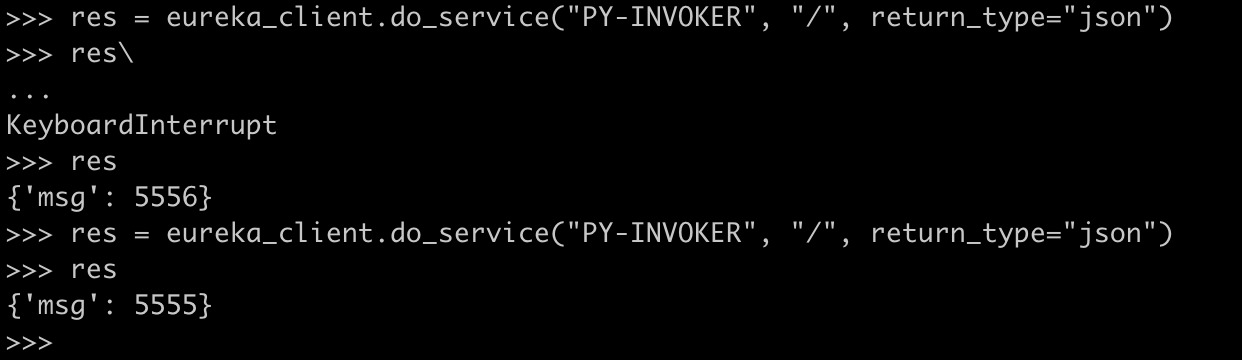
可以看到成功访问到,并且每次调的对象不一定一样。
关于py-eureka-client的使用,可以参考 https://gitee.com/keijack/python-eureka-client
其实,就是通过Python SDK 和 Eureka对外暴露的HTTP接口进行交互,也可以自行实现。
结论
Consul和Eureka都被用来做服务注册和发现,但是两者不太相同。Consul遵循 CP 原则,跟ZooKeeper一样使用raft一致性算法,有leader 和 peer。Eureka遵循 AP 原则,所有server都是一样地位。
Consul内置健康检查功能,可以实现无侵入式的服务注册。Eureka与Spring无缝衔接,但是2.x已经闭源而且Netflix宣布不再进行维护。
Kong比较灵活,后续有非常丰富的插件,就路由转发,这个点而言,和Spring Cloud Gateway都可以做到。
而后续的关于鉴权、熔断、限流等都有对应的插件来实现,需要后面慢慢探索。但是需要额外实现,从Consul向Kong同步的watcher脚本。
所以,用啥?。。。
我比较喜欢Consul……